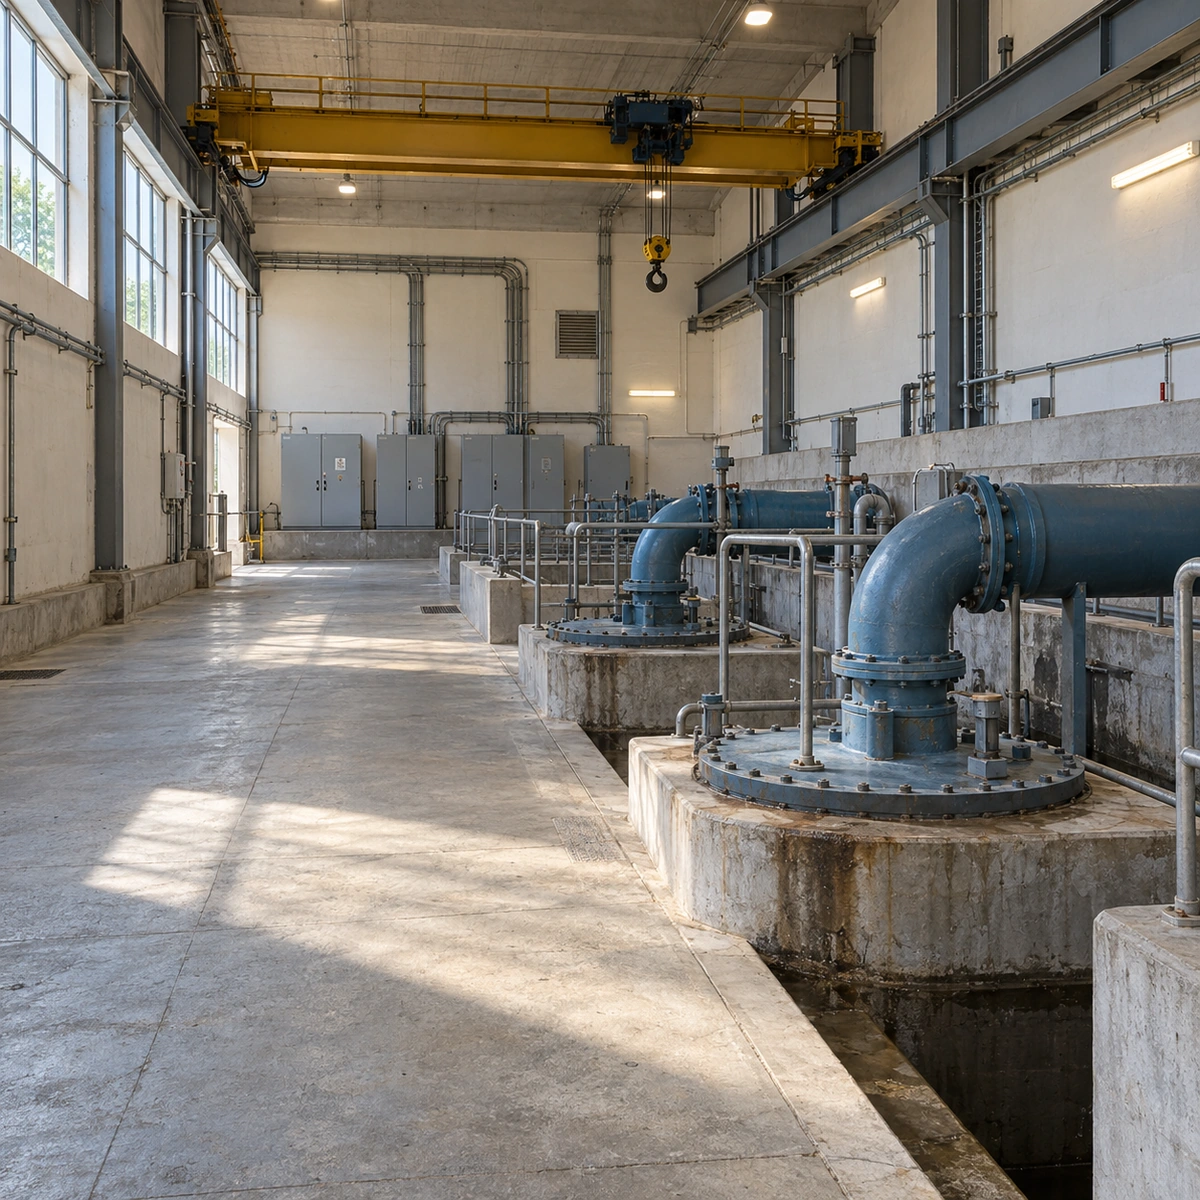
A PRV station for water supply reduces high or fluctuating upstream pressure to a controlled downstream pressure for a building, pressure zone, distribution network or industrial water system.
However, a reliable pressure reducing valve station is more than a single valve installed in a pipeline. Correct performance depends on the hydraulic data, valve sizing, station arrangement, cavitation risk, strainers, isolation valves, pressure instruments, surge protection and commissioning procedure.
The most common design mistake is selecting a water supply PRV only by matching the valve size to the pipe diameter. A valve that can pass the maximum flow may still be too large to regulate the minimum flow. The result can be pressure hunting, noise, seat damage and unstable downstream pressure.
This guide explains how to design a PRV station, select the correct valve arrangement, diagnose common problems and prepare a complete technical specification.
Quick Answer
A reliable PRV station should be designed around five values:
- Minimum upstream pressure
- Maximum upstream pressure
- Required downstream pressure
- Minimum operating flow
- Maximum operating flow
The valve should be sized by flow capacity and operating range—not simply by pipe diameter.
For a stable, moderate flow range, one pilot-operated PRV may be sufficient. For a wide difference between minimum and maximum flow, a small low-flow valve and a larger main valve can be installed in parallel. For a very large pressure reduction or serious cavitation risk, two or more valves may be installed in series to reduce pressure in stages.
What Is a PRV Station for Water Supply?
A PRV station is an assembly of valves, instruments and pipe fittings used to reduce and stabilize water pressure before water enters a lower-pressure zone.
It is commonly installed at:
- The inlet of a municipal pressure zone
- The boundary of a district metered area
- A high-rise building pressure zone
- A water treatment plant distribution line
- An industrial process-water system
- A reservoir outlet pipeline
- An irrigation distribution network
- A secondary water supply system
- A branch serving pressure-sensitive equipment
The main component is the pressure reducing valve. However, the complete station may also include isolation valves, strainers, pressure gauges, transmitters, flow meters, relief valves, dismantling joints and control equipment.
If you need a valve-level explanation before planning the complete station, read this guide to pressure reducing valves in water supply systems.
What a PRV Station Can and Cannot Do
A PRV station can:
- Reduce excessive upstream pressure
- Maintain a controlled downstream pressure
- Protect pipes, meters and connected equipment
- Divide a network into pressure zones
- Reduce pressure-dependent leakage
- Improve pressure stability during demand changes
- Support remote pressure management
A PRV station cannot:
- Increase pressure when upstream pressure is insufficient
- Eliminate every water hammer event
- Compensate for an undersized supply pipeline
- Maintain the set pressure beyond its flow capacity
- Remove debris without a suitable strainer
- Protect the downstream network if an uncontrolled bypass is left open
When inlet pressure falls too close to the required outlet pressure, the valve will move toward its fully open position. At that point, it acts mainly as a hydraulic restriction and cannot boost the downstream pressure.
How Does a Pressure Reducing Valve Station Work?
A pilot-operated PRV uses downstream pressure as its control signal.
The pressure reducing pilot senses the downstream pressure through a sensing line. It then regulates the pressure in the main valve control chamber.
When Downstream Pressure Is Too Low
The pilot causes the main valve to open further. Flow through the station increases, helping downstream pressure recover toward the setpoint.
When Downstream Pressure Is at the Setpoint
The pilot balances the hydraulic control circuit. The main valve holds a throttled position appropriate for the current demand.
When Downstream Pressure Is Too High
The pilot causes the main valve to move toward the closed position. This restricts flow and reduces the downstream pressure.
During No-Flow Conditions
The valve should move toward the closed position and prevent the downstream pressure from continuing to rise. If pressure slowly increases during a true no-flow condition, debris or damage at the seat may be causing pressure creep.
A hydraulically operated PRV normally uses the energy of the water itself and does not require external electrical power. Electronic or solenoid controls can be added when remote setpoint changes, scheduled pressure control or SCADA integration are required.
Typical PRV Station Components
A basic flow arrangement may look like this:
Supply main → upstream isolation valve → strainer → pressure measurement → PRV line → downstream pressure measurement → downstream isolation valve → pressure zone
Additional branches may contain a pressure relief valve, low-flow PRV, flow meter, drain connection or standby valve.
Not every project requires every component. The final arrangement should follow the hydraulic study, local regulations and maintenance strategy.
| Component | Main function | Important design consideration |
|---|---|---|
| Upstream isolation valve | Isolates the station for maintenance | Must be fully open during normal regulation |
| Strainer | Protects the pilot circuit and valve seat from debris | Check mesh size and clean pressure loss |
| Upstream pressure gauge or transmitter | Measures actual PRV inlet pressure | Install where it represents pressure at the valve |
| Pressure reducing valve | Controls downstream pressure | Size by flow range and pressure conditions |
| Downstream pressure gauge or transmitter | Confirms regulated pressure | Keep the sensing point away from severe turbulence |
| Downstream isolation valve | Allows safe station isolation | Open slowly during commissioning |
| Pressure relief valve | Limits abnormal downstream overpressure | Size for a defined failure or transient scenario |
| Flow meter | Measures station demand and supports pressure management | Follow straight-run and grounding requirements |
| Dismantling joint | Provides removal space for valve maintenance | Do not use it to correct major misalignment |
| Air valve | Releases or admits air where the pipeline profile requires it | Do not install randomly beside the PRV |
| Drain or sump | Removes leakage, flushing water or relief discharge | Especially important in underground chambers |
| Pressure transmitter and controller | Supports alarms or remote setpoint control | Define power loss and communication failure behavior |
A properly installed strainer can prevent debris from blocking the pilot circuit or damaging the seat. Mesh size should be selected carefully because an excessively fine or clogged screen can create substantial pressure loss. See the Y strainer installation guide for positioning and maintenance details.
For large flanged valves, a dismantling joint for water pipelines can make future valve removal much easier.
Data Required Before Designing a PRV Station
Valve selection should begin only after the hydraulic operating envelope has been defined.
Upstream Pressure Data
Specify:
- Minimum dynamic inlet pressure
- Normal operating inlet pressure
- Maximum dynamic inlet pressure
- Maximum static inlet pressure
- Pump start and stop pressures
- Reservoir high and low water levels
- Seasonal pressure variation
- Elevation at the proposed station
Using only the normal upstream pressure can produce a valve that fails during peak demand or cavitates during high-pressure, low-flow conditions.
Downstream Pressure Requirements
Specify:
- Required pressure immediately downstream of the station
- Minimum pressure at the critical consumer
- Maximum permitted pressure at the lowest network point
- Downstream pipeline pressure rating
- Equipment pressure limits
- Normal and emergency setpoints
- Allowed pressure variation
The station setpoint must account for elevation and friction losses between the station and the critical point.
A simplified calculation is:
PRV setpoint ≈ minimum required pressure at the critical point + elevation head + friction loss + control allowance
Approximately 1 bar is equal to 10.2 metres of water head.
If the critical point is higher than the PRV station, additional station pressure is required. If part of the zone is below the station, the static pressure at the lowest point must also be checked.
Flow Data
Specify:
- Minimum night flow
- Normal average flow
- Peak-hour flow
- Maximum design flow
- Fire flow, if applicable
- Filling or flushing flow
- Future expansion flow
- Flow direction and reverse-flow possibility
The minimum flow is often as important as the maximum flow. A valve selected only for peak demand may operate almost closed at night, causing instability and excessive wear.
Water and Pipeline Data
Also provide:
- Pipe diameter and material
- Water temperature
- Potable, raw, reclaimed or process-water service
- Suspended solids and water quality
- Flange standard
- Pressure class
- Internal and external coating requirements
- Elastomer requirements
- Available installation space
- Aboveground, underground or chamber installation
- Power and communication availability
- Required drinking-water approvals
Do Not Select a PRV Only by Pipe Diameter
A DN300 pipeline does not automatically require a DN300 pressure reducing valve.
Control valves are commonly selected smaller than the main pipeline when a smaller valve can pass the required flow without excessive velocity, pressure loss, noise or cavitation.
For water, a simplified valve coefficient relationship is:
Q = Kv × √(ΔP / SG)
Where:
- Q = flow rate in m³/h
- Kv = metric valve flow coefficient
- ΔP = pressure drop across the valve in bar
- SG = specific gravity of the fluid, approximately 1 for water
This formula is useful for preliminary checking, but final selection must also consider:
- Valve opening at minimum flow
- Valve opening at maximum flow
- Minimum available differential pressure
- Maximum pressure reduction
- Recommended continuous velocity
- Cavitation limits
- Noise limits
- Pilot stability
- Valve body pressure rating
- Manufacturer-specific flow curves
A large valve with more than enough maximum capacity may spend most of its operating life at a very small opening. This is one of the main causes of hunting and seat erosion.
Direct-Acting vs Pilot-Operated PRV
| Selection factor | Direct-acting PRV | Pilot-operated PRV |
|---|---|---|
| Typical application | Small building services and local equipment | Municipal, industrial and large water systems |
| Typical valve size | Small to medium | Medium to very large |
| Flow capacity | Lower | Higher |
| Control accuracy | Suitable for simpler systems | Better for variable-flow networks |
| External power | Not normally required | Not required for basic hydraulic control |
| Control options | Limited | Pressure sustaining, flow control, solenoid and remote control options |
| Sensitivity to debris | Moderate | Pilot passages require clean control water |
| Maintenance complexity | Relatively simple | Requires pilot circuit inspection and calibration |
For large pipelines and variable demand, a pilot-operated valve is generally preferred. Norite’s F8020 pilot-operated pressure reducing valve is designed for high-capacity pressure control applications, including large-diameter municipal and industrial water systems.
Common PRV Station Configurations

1. Single PRV Station
A single PRV is suitable when:
- Flow variation is moderate
- The valve can regulate both minimum and maximum demand
- Shutdown for maintenance is acceptable
- Pressure reduction is within the valve’s cavitation limits
- The application does not require full redundancy
It is the simplest and most economical configuration, but it has limited turndown and no online standby line.
2. Parallel High-Flow and Low-Flow PRVs
A small PRV and a larger main PRV are installed in parallel.
The small valve handles minimum night flow and other low-demand conditions. As demand increases and downstream pressure falls, the larger valve begins opening to provide additional capacity.
This arrangement is useful when:
- Night flow is very low
- Peak demand is many times higher than minimum demand
- A single large valve would be unstable near the closed position
- The network requires continuous pressure regulation
The setpoints are normally staggered so the small valve controls low demand and the main valve enters service when required. The exact setpoint difference must follow the selected valve manufacturer’s control logic.
An automatic low-flow PRV should not be confused with an uncontrolled manual bypass. A manual bypass capable of sending full upstream pressure downstream can defeat the protection provided by the station.
3. Parallel Duty and Standby PRVs
Two full-capacity valve lines can be installed in parallel when service continuity is critical.
One line operates while the other remains available for maintenance or automatic changeover. Isolation valves should allow either branch to be removed without shutting down the entire pressure zone.
The designer must define:
- Whether the standby valve is normally isolated or hydraulically active
- How the setpoints are coordinated
- Whether the valves alternate duty
- How a failed-open valve will be detected
- Whether one valve must carry 100% of peak flow
4. Series PRV Station
Two or more PRVs can be installed in series to divide a large pressure reduction into stages.
This arrangement is considered when:
- Upstream pressure is extremely high
- Required downstream pressure is very low
- A single-stage valve would enter a severe cavitation zone
- Noise or vibration is expected
- Intermediate pressure control improves valve life
For example, instead of reducing directly from 16 bar to 3 bar, the station may reduce pressure through an intermediate stage. The actual intermediate setpoint must be selected using the valve manufacturer’s cavitation data.
Series valves provide staged pressure reduction, but they do not automatically provide complete redundancy. The downstream pressure rating and failure protection strategy must still be evaluated.
5. Pressure Reducing and Pressure Sustaining Station
A combined control valve can reduce downstream pressure while maintaining a minimum upstream pressure.
This is useful when excessive downstream demand could otherwise:
- Drain an upstream reservoir too quickly
- Reduce pressure in a high-priority supply main
- Affect another pressure zone
- Overload a pump or treatment process
The difference between pressure reduction, flow control and level control is explained in this comparison of flow control valves, pressure reducing valves and float valves.
6. Modulated Pressure Management Station
A pressure management valve can adjust its outlet setpoint according to:
- Time of day
- Measured flow
- Remote pressure at a critical point
- Reservoir level
- SCADA command
- Leakage-control strategy
For example, a network may require higher pressure during peak daytime demand but a lower setpoint at night. Reducing unnecessary nighttime pressure can help control background leakage and pipe stress.
The control system should include defined fail-safe behavior if electrical power, communication or a remote sensor is lost.
Cavitation, Noise and Velocity Checks
Cavitation occurs when local pressure inside the valve drops below the water vapor pressure. Vapor bubbles form and then collapse as pressure recovers downstream.
Repeated bubble collapse can cause:
- A gravel-like or crackling noise
- Strong vibration
- Pitting on the valve body or trim
- Seat and disc damage
- Pilot instability
- Shortened valve life
- Downstream pressure fluctuation
Cavitation risk is highest when the inlet pressure is high, the outlet pressure is low and the valve is throttling under demanding flow conditions.
How to Reduce Cavitation Risk
Possible solutions include:
- Dividing the pressure reduction into two or more stages
- Selecting anti-cavitation trim
- Changing the valve size or body pattern
- Relocating the station
- Increasing the controlled downstream pressure where the system permits
- Using a valve designed for severe pressure reduction
- Reviewing all operating points, not only normal flow
Do not rely on one universal inlet-to-outlet pressure ratio. Cavitation limits vary with valve design, size, opening, temperature and flow. Final selection should be checked against the manufacturer’s cavitation chart or sizing software.
High velocity through the valve or downstream pipe can also cause noise and vibration even when full cavitation is not present. Pipe reducers, supports and downstream fittings should be included in the review.
Pressure Relief and Surge Protection
A pressure reducing valve controls normal downstream pressure. A pressure relief valve protects against abnormal overpressure by discharging water when its set pressure is exceeded.
These two valves have different functions.
The downstream relief valve setpoint should normally be:
- Above the normal PRV operating setpoint
- Below the maximum allowable downstream pressure
- Coordinated with alarms and shutdown controls
- Verified against static and transient conditions
Relief capacity should be calculated for the defined failure scenario. Copying a generic percentage of PRV capacity may be unsafe if a failed-open main valve can pass more water than the relief valve can discharge.
The discharge line must also route water safely. An underground chamber without adequate drainage can flood, damage instruments and create a confined-space hazard.
A relief valve is not always a complete solution for water hammer. Pump trips, rapid valve movement, check valve slam and sudden demand changes may require a separate transient analysis and surge-control equipment.
Air valves should be positioned according to the pipeline profile, filling and draining conditions—not simply installed next to every PRV. See the guide to air valve installation in water pipelines for location principles.
PRV Station Layout and Installation Requirements
A good station layout should provide enough space for operation, inspection and future removal.
Provide Maintenance Access
Operators should be able to:
- Remove the pilot filter
- Adjust the pressure pilot safely
- Read pressure gauges
- Remove the valve cover and diaphragm
- Clean the strainer
- Operate isolation valves
- Remove the main valve if necessary
- Access transmitters and wiring
- Drain the chamber safely
Support the Pipeline Correctly
The PRV body and nearby fittings should not carry uncontrolled pipe loads. Provide suitable supports around heavy valves, reducers, dismantling joints and branch connections.
A dismantling joint provides axial installation tolerance, but it does not replace proper alignment, anchoring or pipe support.
Install the Valve in the Correct Direction
Follow the arrow marked on the body. Orientation requirements vary by valve design, so confirm whether horizontal, vertical or alternative installation is permitted.
Protect the Sensing Line
The downstream sensing point should:
- Represent the pressure being controlled
- Be located away from severe turbulence where possible
- Remain open and free of blockage
- Be protected from accidental isolation
- Be clearly identified
- Avoid trapped air where it affects the control signal
Plan the Chamber Environment
For underground or enclosed stations, consider:
- Drainage and sump capacity
- Flood level
- Ventilation
- Lighting
- Safe access
- Confined-space requirements
- Corrosion protection
- Condensation
- Freezing protection
- Instrument cable routing
- Lifting points for valve removal
A technically correct valve can still become difficult and expensive to maintain if the chamber layout is too small.
PRV Station Commissioning Procedure
Commissioning should be completed gradually and recorded.
Step 1: Verify the Installation
Check:
- Flow direction
- Valve and flange ratings
- Pilot tubing connections
- Isolation valve positions
- Strainer orientation
- Pressure gauge ranges
- Sensing line connection
- Pipe supports
- Relief discharge route
- Electrical and SCADA connections
Step 2: Flush the Pipeline
Construction debris is a major cause of early PRV failure. Flush the pipeline according to the approved procedure without forcing debris through sensitive pilot passages or control trim.
Inspect and clean the strainer after initial flushing.
Step 3: Fill the Station Slowly
Open the upstream isolation valve slowly. Allow the valve body and pilot circuit to fill while releasing trapped air according to the manufacturer’s instructions.
Rapid filling can cause surge, unstable movement or damage to pressure instruments.
Step 4: Establish a Controlled Flow
Create a stable downstream demand. Do not attempt final adjustment using only an unreliable or uncalibrated pressure gauge.
Step 5: Adjust the Downstream Setpoint
Make small adjustments and allow the station to stabilize after each change. Turning direction and adjustment sensitivity vary by pilot design, so follow the valve manual.
Step 6: Test the Full Operating Range
Record performance at:
- No flow
- Minimum flow
- Normal flow
- Peak flow
- Minimum inlet pressure
- Maximum inlet pressure, where safely available
Confirm that outlet pressure remains within the specified control band.
Step 7: Coordinate Parallel or Series Valves
For parallel valves, confirm the intended opening sequence and setpoint difference.
For series valves, verify the intermediate pressure and ensure both valves remain within their approved operating zones.
Step 8: Test Protection and Alarms
Where included, verify:
- High downstream pressure alarm
- Low downstream pressure alarm
- Relief valve operation
- Flow alarm
- Remote pressure signal
- Automatic shutdown
- Power-loss behavior
- Communication-loss behavior
Step 9: Record the Baseline
The commissioning report should include:
- Upstream pressure
- Downstream pressure
- Flow rate
- Pilot settings
- Strainer differential pressure
- Valve opening indication, if available
- Noise and vibration observations
- Relief and alarm setpoints
- Instrument calibration data
These values become the reference for future troubleshooting.
Common PRV Station Problems and Solutions
| Symptom | Likely causes | Recommended checks |
|---|---|---|
| Downstream pressure too high | Pilot set too high, blocked sensing line, debris on seat, damaged seat, incorrect pilot valve position, uncontrolled bypass open | Verify gauge, inspect bypass, check sensing line and pilot circuit, inspect seat after isolation |
| Downstream pressure too low | Insufficient inlet pressure, clogged strainer, partially closed isolation valve, undersized PRV, excessive demand, pilot set too low | Record inlet pressure and flow, check strainer differential, confirm valve capacity |
| Pressure slowly rises at no flow | Seat leakage, trapped debris, seat damage or downstream thermal expansion | Confirm true no-flow condition and distinguish valve leakage from thermal expansion |
| Pressure hunts up and down | Oversized valve, very low flow, poor pilot tuning, air in control circuit, turbulent sensing point | Review minimum flow, tune only according to manufacturer instructions, consider a low-flow PRV |
| Valve will not open | Pilot isolation valve closed, blocked pilot filter, damaged diaphragm, no inlet pressure, incorrect tubing connection | Check control circuit and pressure data before disassembly |
| Valve will not close | Seat obstruction, diaphragm damage, blocked control passage, incorrect pilot arrangement | Isolate and depressurize before inspecting internal components |
| Gravel-like noise | Cavitation | Check inlet pressure, outlet pressure and flow against the cavitation chart |
| Whistling or vibration | High velocity, excessive pressure drop, unstable throttling, poor pipe support | Check sizing, valve opening, reducers and mechanical supports |
| Pressure drops during peak demand | Valve undersized, strainer clogged, inlet pressure collapse, downstream pipe loss too high | Compare actual peak flow with design data and measure pressure at multiple points |
| High pressure appears only at night | Low flow instability, seat leakage, fixed setpoint too high or network demand reduction | Review minimum night flow and consider low-flow or pressure management control |
| Frequent pilot blockage | Dirty water, inadequate straining, scale or corrosion products | Improve filtration, flushing and water-compatible materials |
| Water hammer after demand changes | Rapid valve response, pump event, check valve slam or poor surge control | Perform transient review; do not solve only by changing the PRV setpoint |
| Different gauges show different pressure | Calibration error, blocked pressure tapping, different elevations or transient fluctuation | Calibrate instruments and compare readings at the same hydraulic condition |
| External leakage | Loose tubing, damaged fittings, diaphragm cover leakage, flange gasket damage | Isolate safely, locate the leak and replace the correct sealing component |

A Safe Troubleshooting Sequence
Before changing the pilot setting:
- Confirm the pressure gauges are accurate.
- Record inlet pressure, outlet pressure and flow.
- Check upstream and downstream isolation valves.
- Inspect strainer pressure loss.
- Confirm pilot and sensing-line valve positions.
- Compare no-flow, low-flow and peak-flow behavior.
- Check for noise, vibration and leakage.
- Review the original valve sizing.
- Isolate and depressurize the station before opening any component.
Blindly turning the pilot adjustment screw can hide the original fault and make the station less stable.
PRV Station Maintenance Plan
Maintenance frequency should be based on water quality, operating hours, pressure trends and manufacturer instructions.
| Maintenance item | Suggested approach |
|---|---|
| Pressure and flow trends | Monitor continuously where transmitters are available |
| External leakage and abnormal noise | Inspect during routine operator rounds |
| Strainer | Check soon after commissioning and then according to differential pressure |
| Pilot filter and tubing | Inspect for blockage, scale and leakage |
| Pressure gauges | Calibrate at the project-defined interval |
| Relief valve | Function-test according to the safety and maintenance plan |
| Main valve diaphragm and seals | Inspect based on operating condition and service history |
| Coating and chamber corrosion | Check during scheduled station inspections |
| Isolation valves | Exercise periodically to confirm operability |
| SCADA alarms and remote controls | Test under controlled conditions |
| Spare parts | Keep approved pilot, diaphragm, seal and gauge kits available |
Do not clean or dismantle the valve simply because a fixed calendar date has arrived. Pressure trends, strainer differential pressure, water quality and operating performance should guide maintenance decisions.
Worked PRV Station Selection Example
Consider a municipal pressure zone with:
- Upstream pressure: 9 to 12 bar
- Required downstream pressure: 4 bar
- Minimum night flow: 3 m³/h
- Normal flow: 60 m³/h
- Maximum flow: 180 m³/h
- Large variation between day and night demand
A single valve selected only to pass 180 m³/h may be too large to regulate 3 m³/h accurately.
A more suitable concept may be:
- A small PRV for minimum night flow
- A larger main PRV for normal and peak demand
- Staggered setpoints to coordinate valve opening
- A strainer sized for acceptable clean and dirty pressure loss
- Pressure transmitters upstream and downstream
- A relief valve sized for the defined failure scenario
- A cavitation check at 12 bar inlet and 4 bar outlet
- A review of staged pressure reduction if the selected valve enters a damaging cavitation zone
- Dismantling space and isolation for both PRV branches
- SCADA alarms for abnormal downstream pressure
The final valve sizes cannot be confirmed from pipe diameter and pressure values alone. Manufacturer flow curves, cavitation limits and the complete hydraulic operating envelope are still required.
PRV Station RFQ and Procurement Checklist
When requesting a quotation, provide the following information.
Hydraulic Conditions
- Minimum, normal and maximum inlet pressure
- Required outlet pressure
- Minimum, normal and maximum flow
- Static and dynamic pressure conditions
- Emergency or fire flow
- Pipeline elevation profile
- Reverse-flow possibility
- Maximum allowable downstream pressure
Valve Requirements
- Valve type
- Nominal size
- Pressure class
- Flange standard
- Body material
- Trim material
- Diaphragm and elastomer material
- Internal and external coating
- Potable-water approval
- Low-flow bypass requirement
- Pressure sustaining function
- Anti-cavitation trim
- Solenoid or remote control
- Position indication
Station Requirements
- Single, parallel or series configuration
- Duty/standby philosophy
- Isolation valves
- Strainer and mesh size
- Pressure gauges and transmitters
- Flow meter
- Relief or surge protection
- Dismantling joints
- Chamber dimensions
- Drainage and ventilation
- SCADA communication protocol
- Required spare parts
Documentation and Testing
- General arrangement drawing
- Hydraulic sizing report
- Flow and cavitation calculation
- Valve datasheet
- Material certificates
- Coating inspection report
- Pressure test report
- Functional test report
- Instrument calibration certificates
- Installation and maintenance manual
- Recommended spare-parts list
Applicable standards depend on project location and valve type. Buyers should verify pressure class, flange compatibility, coating, potable-water requirements and testing scope rather than naming a standard without checking its application. Norite’s valve standards guide provides an introduction to common EN, AWWA, API and ISO requirements.
Before shipment, the valve should undergo the agreed shell, seat and functional tests. Learn what should appear in a valve hydrostatic test report.
For supplier qualification, documentation and production-control checks, use this valve supplier evaluation guide.
Frequently Asked Questions
What is a PRV station in a water supply system?
A PRV station is a complete valve and instrument assembly that reduces high upstream water pressure to a controlled downstream pressure. It normally includes a pressure reducing valve, isolation valves, a strainer and pressure instruments.
Should the PRV be the same size as the pipe?
Not necessarily. A PRV should be selected according to minimum and maximum flow, available differential pressure, velocity, cavitation and control range. A valve smaller than the main pipe is common when confirmed by hydraulic sizing.
Why are two PRVs installed in parallel?
Two PRVs may be installed in parallel to handle a wide flow range or provide redundancy. A small valve can regulate low demand while a larger valve handles peak flow.
When should PRVs be installed in series?
Series installation is considered when the total pressure reduction is too severe for one valve, or when staged reduction is needed to reduce cavitation, noise and trim damage.
What is the difference between a PRV and a pressure relief valve?
A PRV regulates normal downstream pressure by throttling the incoming flow. A relief valve opens during abnormal overpressure and discharges water to protect the downstream system.
Why does downstream pressure increase at night?
Possible causes include lower network demand, an oversized PRV operating near closed position, seat leakage, a blocked control circuit or a fixed setpoint that is unnecessarily high for nighttime conditions.
Can a PRV eliminate water hammer?
No. A PRV may influence system transients, but it is not a universal water hammer solution. Pump operation, valve closure time, check valves, pipeline length and air pockets must also be evaluated.
Where should the downstream sensing line be connected?
It should connect to a stable point that accurately represents the controlled downstream pressure. Avoid highly turbulent locations and follow the valve manufacturer’s required distance and tubing arrangement.
How often should a PRV station be maintained?
There is no universal interval. Maintenance depends on water quality, debris load, operating cycles, pressure trends and manufacturer recommendations. New stations should be inspected more frequently after commissioning.
What information does a PRV supplier need?
At minimum, provide inlet pressure range, required outlet pressure, minimum and maximum flow, pipe size, flange standard, pressure rating, water quality, installation layout and required control functions.
Conclusion
A reliable PRV station for water supply must be designed as a complete hydraulic system—not as an isolated valve purchase.
The most important design principles are:
- Define minimum and maximum pressure and flow conditions
- Size the valve by hydraulic performance rather than pipe diameter
- Check both minimum-flow stability and maximum-flow capacity
- Use parallel valves when the demand range is too wide for one valve
- Use series reduction when cavitation or excessive pressure drop requires staging
- Protect the pilot circuit with appropriate straining
- Coordinate pressure relief, surge protection and downstream pressure ratings
- Provide maintenance access, drainage and dismantling space
- Commission the station gradually and record baseline data
- Diagnose faults using pressure and flow measurements before adjusting the pilot
Norite supplies pressure reducing valves and related pipeline components for municipal water supply, water treatment, irrigation and industrial water projects.
For PRV station selection support, send the minimum and maximum inlet pressure, required outlet pressure, minimum and maximum flow, pipe size, flange standard, water quality and station drawing. These parameters allow the valve configuration, size, pressure class and control functions to be evaluated before quotation.